
What Are the Most Common Post-Storm Repairs in Jacksonville Beach Homes?
Summary
- Wind-driven rain and salt air change repair priorities in Jacksonville Beach
- Moisture verification and dry-out come before rebuild choices
- Some budget-friendly triage saves materials; some just hides damage
- Coastal-rated fasteners, paints, and hardware reduce repeat failures
- Permits, HOA rules, and insurance scopes shape timing and sequence
Introduction
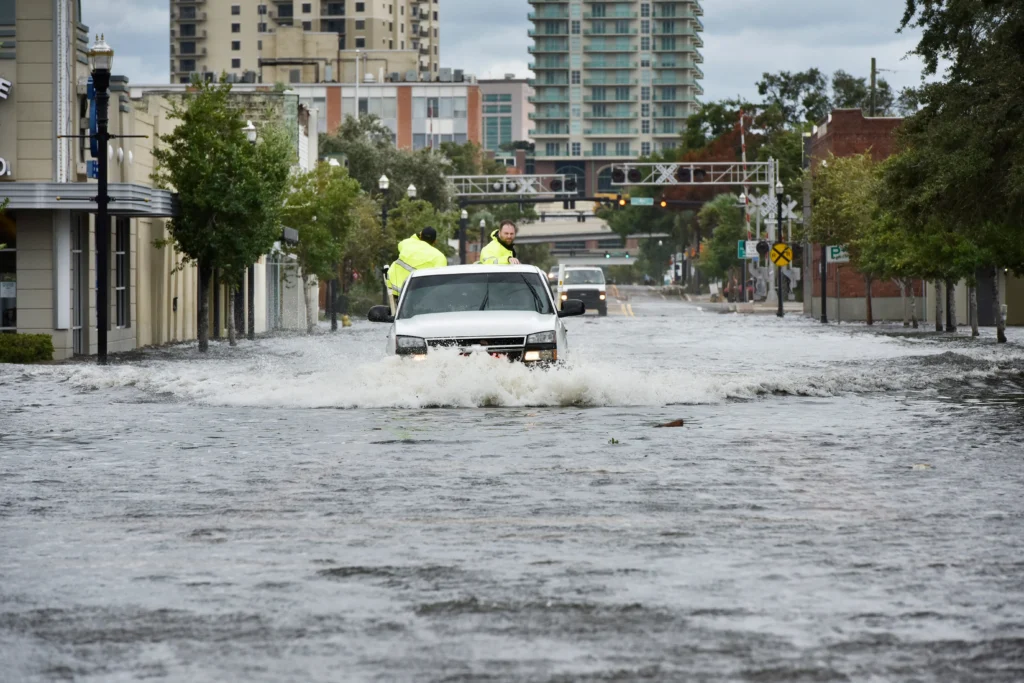
On the First Coast, storms don’t follow a schedule. We see nor’easters that sit and soak, tropical systems that drive rain sideways, and fast-moving squalls that shake soffits and screens. From Jacksonville Beach to Atlantic Beach and Neptune Beach, the combination of wind, salt spray, and humidity changes how homes age and how they recover.
We write this from the perspective of Jax Beach Handyman, a locally owned and fully licensed handyman service based in Jacksonville Beach. We work in Duval County’s beach communities year-round. Our notes here come from field experience—what survives, what fails, and what creates regret six months after a storm when moisture shows back up.
Why post-storm repairs here aren’t the same as inland jobs
- Wind-driven rain: Our storms push water up under shingles, sideways into window weeps, and around door thresholds. That means roof edges, flashing, soffit vents, and weatherstripping matter as much as the roof field.
- Salt spray and high humidity: Salt accelerates corrosion on fasteners, hangers, door hardware, and HVAC fins. Humidity keeps materials damp longer, which helps mold colonize behind intact paint films and vinyl baseboards.
- Nor’easters and tropical systems: Long-duration rain can overwhelm gutters and drive leaks at siding transitions. Short, intense bursts lift shingles and pop screen panels. Both produce different repair patterns.
- Code updates and flood realities: Parts of Jacksonville Beach sit in flood zones where electrical and structural work follow stricter rules. Repair choices must consider permits and whether a recurring water path needs redesign—not just patching.
The most common post-storm repairs we see in Jacksonville Beach homes
1) Roof edges, flashing, and temporary dry-ins
Shingles often look fine after a blow, but water enters at ridges, valleys, and rake edges. We routinely install temporary dry-ins at penetrations and valleys, reseat lifted shingles, and replace edge flashing where nails backed out. On older roofs near end-of-life, repeated emergency calls become a pattern worth evaluating.
2) Soffit, fascia, and gutters
Vinyl or aluminum soffits get dislodged by uplift, opening a path for rodents and wind-driven rain into attic edges. Fascia boards rot fast where gutters overflowed. We triage: rehang intact sections, replace rotten segments, and review drip edge and gutter sizing in areas that habitually overtop during nor’easters.
3) Windows, doors, and weatherproofing
After sideways rain, we find wet drywall under windows even if glass never broke. We check sill pans, flashing tape at trim, and deteriorated caulk lines—especially on ocean-facing elevations. Post-storm, new bulb seals and strike adjustments on doors often stop small but chronic leaks.
4) Stucco and Hardie plank patching
Cracks in stucco and gaps at Hardie lap joints pull water behind cladding. Small patches fail if paint systems aren’t matched to coastal conditions. We seal with compatible elastomerics and plan full-coat repaints where patchwork alone won’t hold up to salt air.
5) Screen enclosures and lanais
Panels pop during gusts, and spline channels corrode. Sometimes panel-by-panel fixes make sense; other times, uniform rescreening with better spline and hardware saves return trips.
6) Fences in sandy soil
Panels blow out, but posts are the real issue. Sandy soils don’t hold shallow posts well. Resetting posts deeper with proper footing geometry outlasts swapping boards repeatedly.
7) Interior drywall, baseboards, and cabinets
Wind-driven rain at openings and soffit failures wets wall bottoms. We cut out at measured moisture heights, treat, and dry before rebuild. Kitchen and bath bases often need detach-and-reset where toe-kicks or particleboard got wet.
8) Flooring and subfloors
LVP and laminate can trap water beneath. If subfloor swelling or delamination is present, removing finish flooring is usually the only way to stop lingering odors and cupping.
9) HVAC corrosion checkpoints
Salt-laden moisture pits outdoor coils and fasteners. We document any corrosion and defer to licensed HVAC for coil cleaning or component replacement where efficiency has dropped or where electronics were exposed to floodwater.
10) Electrical safety items
Even without standing water, attic and soffit leaks can drip onto junctions. GFCIs and exterior boxes sometimes need replacement. Flood-exposed subpanels or devices are not candidates for dry-out and reuse.
Common post-storm repair misconceptions
- “Insurance will cover everything.” Policies often exclude gradual deterioration and pre-existing issues like prior wear on flashing or fascia. Documentation matters.
- “Saltwater only affects exterior metal.” We routinely find rust starting on interior fasteners near coastal openings and on furniture hardware in humid, salt-laden air.
- “Fans or dehumidifiers cure wet walls.” Air movement helps, but without opening wet assemblies, mold persists behind paint and vinyl base.
- “Pressure washing is a mold solution.” It can drive spores deeper into stucco and siding gaps. Cleaning plus controlled dry-out and sealing works better.
- “Blue tarps equal a fix.” Tarps are stopgaps. If they stay up long, wind tears them, and water travels sideways beneath.
- “DIY electrical is safe if the house didn’t flood.” Roof or soffit leaks that reached boxes or fixtures still require a qualified check.
- “We didn’t flood, so we can skip moisture checks.” Wind-driven rain creates hidden wet spots that don’t leave puddles but still feed mold.
Budget repair decisions that actually change outcomes
| Decision | When it makes sense | Typical approach | Pros | Watch-outs |
|---|---|---|---|---|
| Temporary dry-in vs. immediate roof repair | Active leak during storm window; roof otherwise mid-life | Peel-and-stick or synthetic underlayment at penetrations/valleys | Buys time for adjuster and full scope | Revisit quickly; wind uplift can reopen paths |
| Immediate section repair vs. replacement | Localized shingle loss, solid decking, no widespread granule loss | Replace shingles/flashings in affected zone | Lower cost now | Color match; roof near end-of-life means repeat calls |
| Drywall cut-out height vs. dry-in-place | Moisture reading above 16% or wet insulation present | Cut 12–24 inches above wet line, remove base, dry cavities | Stops concealed mold | More finishing now, less risk later |
| Detach and reset base cabinets vs. replace | Solid wood boxes lightly wet at toe-kicks | Remove toe-kicks, dry, treat, reinstall/level | Saves cabinetry | Particleboard often won’t recover |
| Soffit/fascia triage | Limited dislodged panels or small rot | Rehang panels, patch fascia, check drip edge | Quick enclosure | Hidden attic moisture still needs venting |
| Gutter rehanging vs. re-run | Hangers failed but slopes are wrong | Re-run with added outlets/downspouts | Prevents repeat overflows | Budget more for proper drainage |
| Fence panel swap vs. post reset | Posts wobbly in sandy soils | Reset deeper posts, proper concrete geometry | Stability | More labor than panel swaps |
| Screen panel repair vs. full rescreen | Few damaged panels, frames sound | Replace panels and spline selectively | Lowest immediate cost | Mixed materials age unevenly; consider full rescreen if many panels are brittle |
For a broader seasonal context, see our Jacksonville Beach home repair checklist for salt, sun, and storms. For post-storm sequencing, we keep a field-tested workflow in our after-the-storm inspection and repairs guide.
Material and method realities in a coastal environment
- Fasteners: Stainless steel outlasts everything here. Hot-dipped galvanized is acceptable in many spots, but electro-galvanized fasteners corrode fast near the ocean.
- Lumber and hardware: Use pressure-treated lumber rated for ground contact where posts meet sandy soils. Pair with coastal-rated brackets and screws.
- Paint systems: Elastomeric coatings over properly primed stucco bridge hairline cracks and take salt better than thin coats. Some primers trap moisture; we pick breathable systems when assemblies are drying.
- Pavers and drainage: After heavy rain, pavers settle and joints wash out. We re-level, reset joint sand, and confirm drainage paths don’t send water toward slabs or door thresholds.
When repair costs stop making sense
- Repeat water intrusion that patching hasn’t solved: If the same window wall shows staining after every nor’easter, it’s time to investigate flashing, sill pans, or cladding transitions rather than repainting again.
- Roofs nearing end-of-life: Multiple emergency calls in one season suggest a replacement plan. Short patches keep water out but don’t stop aging shingles from letting wind under the edges.
- Flood-exposed electrical: Subpanels, receptacles, and breakers that met floodwater should be replaced, not dried.
- Widespread subfloor swelling: If LVP hides soft OSB or plywood, pulling flooring now prevents odor, bounce, and future tile cracks at transitions.
- Persistent moisture or structural questions: Some cases need a remediator or structural engineer to resolve trapped water, microbial growth, or load-path issues.
How to evaluate cost, timing, and risk after a storm
- Photo documentation and moisture readings first: Take wide shots and close-ups. We use a meter to log moisture at baseboards, sills, and ceiling edges. That record helps adjusters and reduces disputes about scope.
- Dry-out before rebuild: “Dry enough” for drywall is typically under the mid-teens in moisture percent on wood, and drywall must read dry across the cut line. Paint goes on last, after consistent readings for at least 24–48 hours.
- Insurance coordination: Scopes often miss hidden wet materials. Supplements with photos, meter readings, and opened cavities tend to get approved more smoothly than narratives alone.
- Permits and HOA rules: In Duval County beach cities, fence replacements, roof work, and structural exterior repairs can require permits and HOA review. Timelines shift when design approvals are involved.
- Lead times and staging: Roofing crews, screen materials, and certain paints back up after regional storms. We stage dry-in, demo, and rebuild to avoid rework if another rain event hits during the process.
Step-by-step post-storm inspection and repair checklist
- Safety sweep: Kill power to any circuits with water exposure. Keep distance from sagging soffits or loose gutters.
- Roofline: From the ground with binoculars if needed—check ridges, valleys, edges, and protrusions. Note lifted shingles and missing ridge caps.
- Soffit and fascia: Look for gaps, missing vent panels, and soft fascia near gutters.
- Gutters and downspouts: Confirm hangers intact, slopes correct, and outlets not clogged.
- Windows and doors: Inspect caulk joints, sill pans (where visible), and interior sills for moisture. Operate locks and check weatherstripping compression.
- Walls and cladding: Mark cracks in stucco and gaps at siding joints. Photograph before cleaning.
- Interior moisture mapping: Use a moisture meter at baseboards, around windows, and below ceiling penetrations. Mark wet areas with painter’s tape.
- Open assemblies where readings stay high: Cut drywall above wet lines; remove soggy insulation and vinyl base.
- Cabinet bases: Remove toe-kicks; inspect backs and sides for swelling or delamination.
- Flooring: Lift thresholds; check for trapped moisture. Pull select planks near doors to inspect subfloor.
- HVAC and electrical: Visual corrosion check on outdoor units; don’t operate flood-exposed equipment. Test GFCIs; replace any that trip or show water exposure.
- Dry-out plan: Dehumidify, run air movers, and ventilate safely. Re-check moisture daily and record readings.
- Scope and sequence: Decide on temporary dry-in vs. permanent repairs; align with insurance scope and any permit needs.
- Materials: Choose coastal-rated fasteners, elastomeric systems where appropriate, and stainless hardware near ocean exposure.
- Final verification: Confirm moisture is stable and low before closing walls or painting. Keep all photos and logs.
Scenario breakdowns: What “typical” looks like on the First Coast
Scenario A: Wind-driven rain with no visible exterior damage
Pattern: Staining below windows and at one corner of a room. Action: Meter the area, open baseboard sections, cut drywall 12–18 inches above the wet line, dry cavities, and replace seals/caulk at the window. Risk of skipping: Odor and microbial growth behind paint within weeks.
Scenario B: Lifted shingles at a valley and a few missing soffit panels
Pattern: Ceiling spot under the valley and damp insulation at the eaves. Action: Temporary valley dry-in, replace damaged shingles and flashing, reinstall soffit with better engagement and added blocking if needed. Risk of skipping: Recurring ceiling stains and attic humidity that rusts fasteners.
Scenario C: Fence sections toppled, posts intact but loose in sand
Pattern: Panels down along a wind corridor. Action: Reset posts deeper with proper footings and rehang panels. Risk of skipping: Repeated panel loss on the next storm because posts can’t resist lateral load in sandy soils.
How post-storm repairs echo into the future
- Time to functional recovery: Proper dry-out before rebuild shortens the number of callbacks and punch-list items later.
- Buyer inspections: Hidden moisture or quick patches show up in infrared scans and probe readings during pre-sale inspections.
- Insurance renewal: Clear, dated photos of repairs, new seals, and corrected drainage help underwriting and avoid conditional renewals.
- Neighbor relations and code: Neatly repaired fences, aligned gutters, and secured soffits reduce neighbor water conflicts and code enforcement visits, which are common in tight-lot beach blocks.
FAQs
Should I wait for the adjuster or start dry-out?
Start dry-out with photos and moisture readings first. Adjusters usually accept mitigation done to prevent further damage, especially with logs.
Patch the roof or replace it this season?
If the roof is mid-life and damage is localized, a section repair works. If you’re near end-of-life and calling for patches every storm, plan replacement.
Remove floors now or try to dry in place?
If meter readings stay high under LVP or laminate and subfloor feels soft or swollen, removal prevents odor and later buckling.
Do windows pit from salt spray after a storm?
Aluminum frames and hardware can pit over time. Rinse exterior frames, then check and refresh seals. Pitting is cosmetic at first but can lead to seal failures.
Who handles soffit and fascia, the roofer or a handyman?
Either, depending on scope. Roofers handle integrated drip edge and fascia on active roof projects. Handymen often address individual sections, vents, and rehangs.
Do I need a permit to replace my fence sections in Jacksonville Beach?
Full replacements and height changes often require permits and HOA approval where applicable. Simple like-for-like panel swaps may not, but verify locally.
What timelines are normal on the First Coast after a storm?
Expect immediate triage within days, dry-out over 3–7 days depending on moisture, and rebuilds scheduled over 1–6 weeks based on permits, materials, and crew availability.
Local notes on scope and sourcing
Materials that claim “coastal-rated” vary. We’ve seen stainless outlast even hot-dipped galvanized near oceanfront lots in Neptune Beach. On the west side of Jacksonville, galvanized holds longer. Paint performance also shifts: elastomerics perform well on beach-facing stucco but can trap moisture if walls weren’t dry. We verify with readings and then choose the coating system accordingly.
If you’re documenting work for search intent like “near me,” keep the location clear in notes: Jacksonville Beach, Duval County, and any HOA subdivision. Insurers and future buyers appreciate precise records. For broader planning we often reference our seasonal tools in the Jacksonville Beach home repair checklist and our post-storm inspection and repair sequence.
About the keyword you might be searching
Many homeowners search for home repair in jacksonville florida after a storm when triage is needed. The phrase points to the full spectrum of tasks we’ve described—roof edges, soffits, window seals, drywall, and corrosion checks—done with coastal methods and materials. If you’re comparing options, verify that any plan includes moisture verification before rebuild.
Long-term outcomes on the First Coast improve when we pair practical triage with lasting choices: stainless where it counts, elastomerics on weathered stucco, deeper fence posts in sand, and measured cut-outs instead of cosmetic patches. Whether the job is small or touches multiple trades, that logic yields fewer callbacks and cleaner inspection reports.
If you keep notes on scope, dates, and photos with moisture readings, your records will also help with underwriting and any future sale. That’s as much a part of effective home repair in jacksonville florida as the tools we bring to the site.
Conclusion
In Jacksonville Beach and the surrounding First Coast, post-storm repairs follow a familiar pattern but require local judgment. We’ve seen that the difference between a quick fix and a durable result often comes down to opening what got wet, drying it fully, and rebuilding with coastal-rated materials. The rest is sequencing—document, mitigate, verify, then close—and respecting how wind and salt shape our homes over time.