
Stop Shower Leaks: Re-Caulk & Re-Grout | handyman jacksonville beach
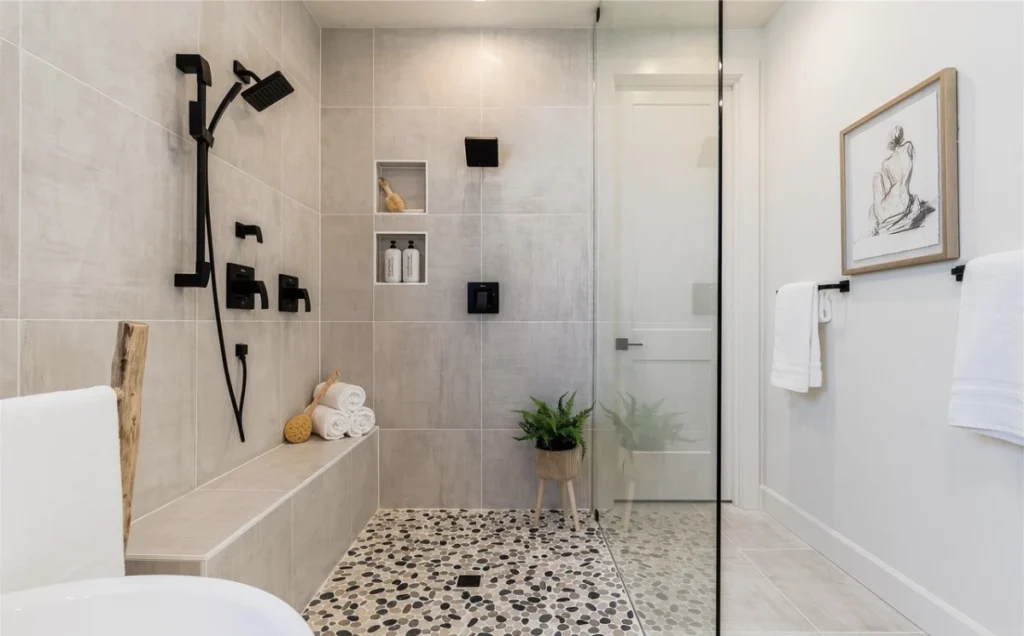
Shower seams break down faster near the coast. Humid air and salt speed up wear. That creates gaps that trap moisture and feed mold. It also opens paths for leaks. With the right re-caulking and re-grouting, you can block water, protect tile, and breathe easier. You will also save money by preventing hidden damage. If you want reliable help, Jax Beach Handyman offers local expertise and fast scheduling with handyman jacksonville beach!
Why Shower Maintenance Matters for Coastal Homes
Jacksonville Beach bathrooms face constant moisture. Small defects turn into leaks fast. Here is why your shower needs regular attention.
- High humidity: Warm, humid air keeps surfaces damp. Damp seams let mildew and mold take hold.
- Salt-laced air: Salt accelerates material breakdown. It dries on surfaces and pulls moisture in, stressing caulk and grout.
- Shower use frequency: Daily showers mean daily water exposure. Any gap lets moisture in behind tile and into walls.
Stay ahead of the damage. A quick inspection each month helps you catch issues before they grow.
What is Re-Caulking and Re-Grouting?

Re-Caulking
Caulk seals change-of-plane joints and seams. That includes where the tub meets the wall, corners, glass door frames, niches, and valve trims. Fresh caulk blocks water where tiles meet other materials.
- Material: 100% silicone or hybrid silicone for wet areas
- Use: Flexible joints that move with temperature and vibration
- Look: Smooth bead that bridges gaps and keeps water out
Re-Grouting
Grout fills the spaces between tiles. It keeps water from wicking behind the surface and supports the tile field. Over time grout cracks, powders, or stains. Re-grouting removes failed grout and installs new grout, then sealing locks out moisture.
- Material: Cement-based or epoxy grout, depending on tile and joint width
- Use: Rigid fill between tiles
- Look: Crisp lines that shed water and resist grime
Differences and Why Both Are Necessary
- Function: Caulk flexes at joints. Grout stays rigid between tiles.
- Locations: Caulk at corners and changes in plane. Grout between tiles on flat surfaces.
- Coverage: Caulk repairs are linear. Grout repairs cover larger tile fields.
You need both for a watertight system. Caulk protects seams. Grout protects the tile surface. If you skip one, water finds a path.
How to Spot Problems Early
Watch for these signs once a month. Quick checks prevent expensive repairs.
- Signs of mold: Dark spots at corners, along the tub line, around niches, or near the base of walls. Musty odor after the shower dries.
- Cracked or missing caulk: Shrinkage, peeling, or gaps in corners and seams. Caulk that pulls away when pressed.
- Cracked or missing grout: Hairline cracks, pinholes, powdery lines, or missing chunks between tiles.
- Water seepage under tile: Spongy or hollow tiles. Grout lines that stay wet longer than the rest. Persistent dampness outside the shower.
- Staining or bubbling on adjacent walls or ceilings: Paint blisters, brown stains, or soft drywall near the shower.
If you see any of these warnings, schedule a repair before water spreads.
Risks of Ignoring Old Shower Caulking
- Mold growth: Mold thrives in damp seams. It spreads into porous materials and releases spores into the air. That affects indoor air quality.
- Tile damage: Water weakens thinset. Tiles loosen, grout erodes, and reattachment costs rise.
- Water leaks into drywall or subfloors: Moisture travels into wall cavities and floors. That causes swelling, rot, and structural damage.
- Higher energy costs: Damp air strains your HVAC. It runs longer to control humidity.
- Health concerns: Mold and mildew irritate allergies and asthma. Strong cleaning chemicals add to headaches.
Example: A cracked tub-to-wall joint can leak a cup of water a day into the wall. In a month, the baseboard swells. In two months, drywall softens. In three months, you see staining on the ceiling below. Re-caulking would have avoided all of this at a fraction of the cost.
Cost to Re-Caulk & Re-Grout in Jacksonville Beach
Prices vary by shower size, tile type, condition of existing materials, and access. Below is a local estimate range for labor and materials.
| Service | Small Shower (3×3 to 3×4) | Standard Shower (3×5 or 4×4) | Large Shower (4×6+ or with bench/niche) | Notes |
|---|---|---|---|---|
| Re-caulking only (tub or shower) | $150–$250 | $200–$350 | $300–$500 | Includes removal, prep, 100% silicone, and smoothing |
| Spot re-grouting (minor areas) | $200–$400 | $300–$600 | $500–$800 | Localized repairs and sealing |
| Full wall re-grout (cement-based) | $450–$800 | $700–$1,200 | $1,000–$1,800 | Includes removal, re-grout, cure, and sealer |
| Full wall re-grout (epoxy) | $700–$1,200 | $1,000–$1,800 | $1,600–$2,600 | Higher material cost, better durability |
| Combo: re-grout + re-caulk | $600–$1,000 | $900–$1,600 | $1,400–$2,800 | Best results for older showers |
Tile material affects cost. Porcelain and ceramic are most common. Natural stone needs extra sealing and careful grout selection. Intricate mosaics take more time.
Get a quick quote from a handyman jacksonville beach after a short on-site inspection. A pro will confirm scope, timeline, and any repair needs behind the tile.
Before/After Table: What Repair Fixes
| Item | Before | After |
|---|---|---|
| Visual | Discolored lines, gaps, black spots | Clean seams, uniform grout, fresh lines |
| Moisture impact | Water seeps into joints and behind tile | Water sheds off surfaces and into the drain |
| Odor | Musty smell after each shower | Neutral smell as surfaces dry faster |
| Cleaning effort | Scrubbing does not remove stains | Light cleaning keeps surfaces bright |
| Indoor air quality | Mold spores and irritants | Reduced mold load and cleaner air |
| Structural risk | Hidden leaks threaten drywall and subfloor | Sealed system protects walls and framing |
Tools and Materials That Work Best Near the Coast
- Mold-resistant 100% silicone caulk: Rated for wet areas and movement. Choose a product labeled for baths and showers.
- Color-matched silicone: Pairs with grout color for a seamless look.
- Cement-based grout with polymer: Good balance of cost and performance for typical ceramic and porcelain.
- Epoxy grout: Best for heavy use, niches, and floors. Resists stains and moisture long term.
- Penetrating grout sealer: Water-based, low odor, and designed for damp climates. Reapply every 12 to 24 months.
- Surface prep tools: Grout saw, oscillating tool with grout blade, caulk removal tool, utility knife, scraper.
- Cleaning tools: Nylon brush, microfiber towels, squeegee, non-abrasive pads.
- Prep supplies: Painter’s tape for clean caulk lines, denatured alcohol or appropriate cleaner to wipe joints.
- Daily maintenance products: Neutral pH cleaner, daily shower spray, and a squeegee to remove standing water.
Tip: Use silicone at all plane changes and around fixtures. Use grout only between tiles. Do not grout corners. Corners move and need flexible caulk.
Why Hiring a handyman jacksonville beach Specialist Makes the Difference
Coastal bathrooms need careful prep and the right products. A local specialist understands humidity cycles, salt exposure, and common failure points. You get a longer lasting repair.
Precise removal and prep
- Removes all failed caulk and loose grout
- Opens cracks to sound edges for proper bond
- Dries the area so new material cures correctly
Correct material selection
- Silicone at all movement joints
- Grout type matched to tile and joint width
- Penetrating sealer that holds up in humid air
Clean lines and smooth finish
- Straight grout joints with consistent depth
- Even caulk bead sized for the joint
- No residue on tile faces
Lower risk and better value
- Finds hidden soft spots early
- Documents issues for insurance if needed
- Reduces repeat repairs through proper sealing
How Mark Helps You
- Local skill: Experienced with Jacksonville Beach tile, grout, and caulk failures. Knows how coastal humidity affects cure times.
- Right tools: Dust control, oscillating tools, diamond blades, and pro-grade sealers and silicones.
- On-time jobs: Clear timelines, staged work for cure periods, and tidy cleanup after each step.
Energy Efficiency Gains from Proper Sealing
Moisture control supports comfort and energy savings. Dry bathrooms load less humidity into your home. Your HVAC runs fewer dehumidification cycles, especially in summer.
- Sealed showers dry faster. Less moisture enters the air.
- Dry air lets your thermostat hold a stable setting.
- Lower indoor humidity reduces mold growth and odors.
For more ideas to save energy at home, read Improve Energy Efficiency with Jacksonville Handyman Services. Tight envelopes, smart fans, and air sealing work together with a dry bathroom.
Moisture Control Tips for Bathroom Longevity
- Ventilation: Run a quiet bath fan during and 20 minutes after showers. Clean the fan grille every three months.
- Squeegee: Pull water off walls and glass after each use. This cuts drying time by half.
- Door and liner: Leave the shower door or curtain partially open to vent moisture.
- Dehumidification: Keep indoor humidity between 40% and 50% when possible.
- Seal schedule: Reseal grout every 12 to 24 months. Replace silicone every 3 to 5 years or at first signs of failure.
See more tips to control moisture and heat inside your home in Beat Jacksonville Beach Heat with Energy‑Smart Handyman Services. Small steps make a big difference in comfort and durability.
Shower Re-Caulking: Step-by-Step Overview
Here is a simple outline. A pro may adjust steps based on your tile type and layout.
- Inspect: Check all joints and tile intersections. Note soft or hollow spots.
- Remove old caulk: Cut and pull out all silicone. Use a caulk remover tool and scraper.
- Clean joints: Remove residue. Wipe with approved cleaner. Let dry fully.
- Tape: Mask both sides of the joint for clean lines.
- Apply silicone: Cut nozzle to the right size. Fill the joint without gaps.
- Tool the bead: Use a caulk tool or a gloved finger lightly dipped in water to smooth.
- Remove tape: Pull tape before skinning. Inspect for skips.
- Cure: Follow product cure time. Keep the area dry until fully cured.
Shower Re-Grouting: Step-by-Step Overview
- Assess: Identify areas that need full removal or spot repairs.
- Remove damaged grout: Use a grout saw or oscillating tool to reach solid material.
- Vacuum dust: Clean the joints deeply. Wipe tile faces.
- Mix grout: Follow manufacturer ratios. Mix only what you can apply within the working time.
- Pack joints: Use a float at a 45-degree angle. Press grout firmly into gaps.
- Initial clean: Wipe diagonally with a damp sponge. Do not pull grout from joints.
- Final clean: After haze forms, buff with a microfiber cloth.
- Seal: After cure, apply a penetrating sealer. Wipe off excess.
Common Mistakes to Avoid
- Grouting corners: Use silicone in corners and changes of plane.
- Applying silicone on damp joints: Trapped moisture weakens adhesion.
- Too small a caulk bead: Undersized beads fail early. Fill the joint fully.
- Skipping sealer on cement grout: Unsealed grout stains and absorbs water faster.
- Using abrasive cleaners: Abrasives scratch tile and weaken grout lines.
Maintenance Timeline for Coastal Bathrooms
| Task | Frequency | Why |
|---|---|---|
| Visual inspection of seams and corners | Monthly | Catch cracks and gaps early |
| Deep clean grout and caulk lines | Quarterly | Remove soaps and biofilm that feed mold |
| Fan grille cleaning | Quarterly | Maintain airflow and moisture removal |
| Grout sealing (cement-based) | 12–24 months | Preserve stain resistance and moisture control |
| Silicone replacement | 3–5 years or at first failure | Keep joints flexible and watertight |
| Tile and substrate check | Annually | Find hollow tiles or soft drywall early |
When to Repair vs Replace
- Repair now if: Gaps are limited, grout is mostly sound, and tiles are solid.
- Plan replacement if: Tiles are loose across large areas, the pan leaks, or walls feel soft. A full rebuild may be more cost effective than repeated repairs.
A skilled pro can test for hidden moisture with a meter and help you weigh options.
How Long Re-Caulking and Re-Grouting Take
- Re-caulking only: 2 to 4 hours plus cure time
- Spot re-grouting: 3 to 6 hours plus cure time
- Full wall re-grouting: 1 to 2 days including cure and sealing
Most showers can be used the next day after silicone cures. Epoxy grout may allow faster return to service. Follow the specific product schedule.
Cleanup and Protection
- Cover adjacent surfaces with drop cloths.
- Use painter’s tape for crisp lines and to protect edges.
- Collect dust at the source using vacuum attachments.
- Dispose of old caulk and grout safely. Do not wash debris down drains.
Health and Safety Notes
- Ventilate during removal and curing.
- Wear eye protection, gloves, and a dust mask during grout removal.
- Use low-VOC sealers and silicones when possible.
Realistic Expectations
- Color match: New grout and caulk may not match aged surfaces exactly. A close match looks clean and uniform.
- Hairline cracks: Old movement in walls may show minor hairlines over time. Proper caulk at corners reduces this.
- Stain resistance: Sealed grout resists stains, but routine cleaning is still needed.
Energy and Comfort Add-Ons
- Timer switch on bath fan: Ensures enough run time after showers.
- Low-sone, high-CFM fan: Moves moisture quietly and efficiently.
- Door sweep and threshold checks: Limit steam migration to bedrooms and closets.
Checklist: Shower Maintenance
- Monthly check: Look for cracked or missing grout. Press on seams to spot loose caulk.
- After each shower: Squeegee walls and glass. Leave the door or curtain partially open.
- Weekly: Wash tile with a neutral pH cleaner. Rinse and dry.
- Quarterly: Clean fan grille and test airflow. Wipe niches and corners.
- Annually: Inspect for hollow tiles and soft drywall. Reseal grout if needed.
- Products to keep on hand: Neutral pH cleaner, microfiber cloths, squeegee, daily shower spray.
- Who to contact: Call a local pro for re-caulking, re-grouting, tile repairs, and fan upgrades. Call a plumber if you suspect a supply line leak.
FAQ
How long do caulk and grout last?
Silicone caulk typically lasts 3 to 5 years in coastal bathrooms. High-use showers may need touch-ups sooner. Cement-based grout can last 10 years or more if sealed and cared for. Epoxy grout often lasts longer and resists stains more effectively.
Can you DIY this job?
Yes, if damage is mild and you have the right tools. Remove all failed material, let the area dry, and use quality silicone and grout. DIY often works for small seams and tiny patches. For large areas, failing corners, or suspected leaks, hire a pro to avoid hidden water damage and callbacks.
What products last longest near the beach?
Use 100% silicone at any change of plane. Choose epoxy grout for heavy-use floors and niches. Use a penetrating sealer on cement grout. Avoid latex caulk in wet areas. Avoid abrasive cleaners that strip sealers.
Does insurance cover water damage?
Policies vary. Sudden and accidental events are more likely covered. Gradual damage from neglected maintenance is often not covered. Keep records of repairs and routine maintenance. If you see staining or soft walls, document early and contact your agent.
Local Tips for Jacksonville Beach Bathrooms
- Mind the sea breeze: Salt rides in open windows. Rinse and dry shower surfaces if windows face the ocean.
- Rainy season: Extend fan run times during summer. More moisture means longer dry times.
- Seasonal rentals: Inspect and refresh caulk between guest stays to prevent mid-season failures.
Signs You Need Help Now
- Visible mold returns within days of cleaning
- Soft drywall or swollen baseboards near the shower
- Tiles sound hollow or move under foot
- Ceiling stains below an upstairs bathroom
- Persistent musty odor even when the shower is not in use
These flags point to water behind the tile. Prompt action limits the fix to re-caulking and re-grouting. Delay can lead to demo and rebuild.
Planning Your Appointment
- Share photos: Corners, niches, tub line, and any damage outside the shower.
- Confirm materials: Tile type, grout type, and past sealers if known.
- Schedule cure time: Plan to avoid shower use until the work fully cures.
- Bundle tasks: Add fan upgrades or minor tile repairs in the same visit to save time.
Set Expectations for Finish
- Caulk bead size: The bead will match joint width. Wider joints need a more visible line.
- Color: Choose bright white, clear, or a color match to your grout.
- Sheen: Many silicones cure with a slight sheen. That is normal.
Simple Troubleshooting After the Job
- Light haze on tile: Buff with a dry microfiber cloth.
- Missed pinhole in grout: Note the location. Small touch-ups are quick.
- Small drip mark in caulk: Minor cosmetic issues can be trimmed and re-tooled once cured.
Action Plan: Stop Leaks and Mold Today
- Inspect: Check all shower seams and grout lines this week.
- Decide: Choose repair scope based on what you see. Start with corners and the tub-to-wall joint.
- Schedule: Book a visit. Share photos and size details to speed up quoting.
- Maintain: Squeegee daily, ventilate, and reseal on schedule.
Re-caulking and re-grouting protect your bathroom and your air. The work is direct, fast, and cost effective when handled early. For dependable local service and a clean finish, contact Jax Beach Handyman. Or schedule a handyman jacksonville beach inspection to confirm what your shower needs and get a clear estimate.
https://shorturl.fm/04tv5
https://shorturl.fm/8pnlx
https://shorturl.fm/qJ1EM
Hey, I’ve been messing around with diuwincolourprediction. It’s kinda cool, gives you some interesting insights. Worth checking out if you’re into this sort of thing! Find out more here: diuwincolourprediction
Alright, so I checked out st666dangnhap. It’s pretty straightforward to get started. If you’re looking for an easy way in, this might be it. Give it a shot! Get logged in: st666dangnhap
Yo, signing up for jalwagames was surprisingly easy. Just a heads-up for anyone looking to jump in and play. Registration’s quick! Join the fun: registerjalwagames